Posts

More Storage!

Image
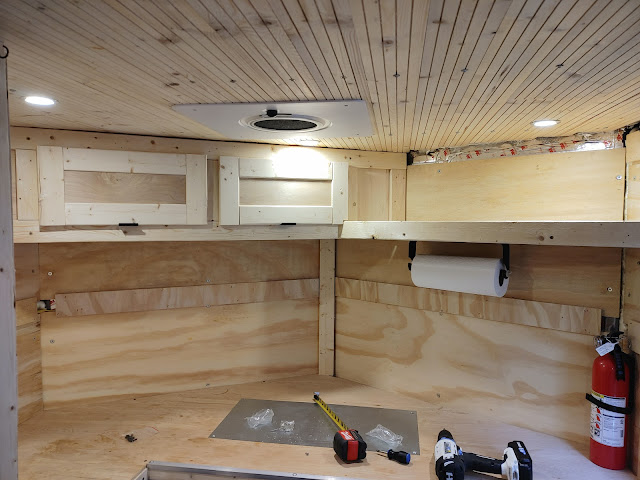
It seems we are continually optimizing our storage spaces and we still don't seem to have enough places to put "things".... like cell phones, binoculars, or shoes. Food, clothes, blankets, tools and camping gear we have pretty well figured out. After spending time on Google to see what others have done we decided we would add a few more shelfs in the kitchen area, some cargo net pockets in the seating/sleeping area, and added a wall of pegboard in the kitchen for hooks and some baskets. I built a small 3 shelf unit up in the nose of the kitchen for small things like bug spray, sunscreen, spices, etc. I also framed in the shelf we have above our lower cupboard, and that helped keep things tidy.  We installed another shelf in the forward section of the kitchen by our cooler space and that created space for water storage out of the way of everything else. We also put 10 hooks up in various locations to hang collapsing bins, hats, bags, etc. The pegboard is installed on the w

Window Mount AC Install with Cargo Hatch

Image
I had a hard time deciding which way to go for AC in this trailer. I really didn't want to deal with a roof top unit (installation or cost), and a mini-split seem like overkill for our simple camper. I do love how quiet a split is and they can be less expensive than a rooftop, but the complexity was really what kept me away. We ended up going with a 5000 BTU window AC unit and mounting it through a hatch on the side of the trailer. The hatch installed just like a window - cut hole, butyl tape the exterior frame, line the cutout with Eternabond tape, and screw in the frame. The hatch I purchased did not come with a frame, so I created one using 1/4" aluminum flat bar and framing it with wood. One advantage to this setup is we don't have to haul around the AC when it's cooler, and we can open the hatch for more daylight or fresh air. The small AC unit is easy to lift into place, anything larger and we would have had to consider installing the rear door to support the wei

First Upgrade - A Larger Window with Emergency Exit

Image
The more we used the camper, the more we wanted more natural light inside. Another consideration we had was how to safely lock the ramp door while we were sleeping. I'm not too worried about any issues, but if we did need to get out and could not get to the front door, or if the door was blocked on the outside, we could be in a tough spot.  An emergency exit window solves both issues nicely! I found one on Ebay and promptly installed it when it came.  This was actually harder than installing the first window. The frame was the same height, but extending the width was a bit cumbersome with the curved cuts in the wood/metal for the original window. After some wrestling with the jigsaw, I had a new opening and the install went smoothly. Unlike the smaller window that had a build in seal, I had to use butyl tape for this one which takes a bit of patience on a warm day as warm butyl tape like to stretch. Once the window was mounted I trimmed the excess butyl tape and ran a bead of silic

Couch / Bed Cushions and Bathroom Curtain

Image
We made box covers and 2 inch foam cushions to complete the couch/bed. We had been using air mattresses to sleep on and these are so much more comfortable and provide more space between the bed and the bunk.  We used the calculator and box cover instructions at SailRite  and they came out great. We used duck canvas for the bottoms and found a pattern we liked in a light canvas for the backs.  We also made a bathroom curtain out of the same material as it was heavy enough to stay in place if we had the back open while we were camping. We had used a beach towel on hooks a few times and any breeze pretty much made it ineffective.  The curtain is hung with a flexible track and S hooks. So far it's working well, but the S hooks will come off at times. Crimping the S hooks keeps them from jumping off.

Overhead Cabinets, Shaker Doors and More Storage

Image
We built a basic set of overhead cabinets with shaker style doors for one side of the vnose in the kitchen, and put a shelf on the other side. The cabinets are simple 2x2 construction mounted with screws to the wall framing. We finished the face of the cabinets with 1x3's and shaker style doors we made with 1x3's and 1/4 in plywood. The finished product looks decent and is very light weight. We also made a cabinet door for the lower kitchen cabinet to match the overheads.  A small set of shelfs was added for more storage near the seating/bed area. These have proven to be very useful for phones, board games, and smaller items. I may add cabinet doors in the future.. still considering options.

Bunk Bed and Refrigerator Install

Image
We installed a removable bunk after a couple trips to give us a bit more sleeping room when we have 3 or 4 people in the camper. The bunk is really simple - duck canvas wrapped around 2x4's that sit in e-track brackets. It's very easy to remove during the day and set up at night.  We wrapped the duck fabric over the 2x4's and attached with a staple gun, then put a piece of plastic edge trim along the bottom to clean it up. This will easily support an adult, and it's surprisingly comfortable, so much so the kid usually hangs out in it like a mini loft.  The brackets are standard e-track board holders and we used a cotter pin on each one to keep the boards from moving when the bed is up.  We found a used mini fridge and put it in the kitchen area. We were unsure what size would be best but so far this one has worked out well. Even if we had a larger fridge we would still bring a small cooler along for drinks and this one allows us to have some storage underneath. I used a

Version 1 Complete! A Useable Camper

Image
Once power was in and the majority of framing complete, we finished the ceiling with 1/4" pine wood tongue and groove boards. Given the 6' interior height, we wanted to keep the ceiling material thin and these and are sturdy enough to mount LED lights to. The cabinet spaces in the kitchen didn't have doors, the bathroom space didn't have a curtain, and we didn't have seat cushions but we had a functional camper. We used air mattresses the first couple trips and that worked pretty well. We used inexpensive adhesive tiles on the floor. They look good, are very durable and are easy clean.  Version 1